GET FREE SOFTWARE WITH SERIAL AND CRACK CLIK HERE

GEt ANY REGISTERES SOFTWARE WITH SERIAL AND CRACK AND ENJOY.

LEARN WEB HACKING CLIK HERE

LEARN WEB HACKING AND ITS JUST FOR EDUCATIONAL PURPOSE.

COOKIES TATOURIAL CLIK HERE AND LEARN

LEARN COOKIE TATOURIAL BUT ITS JUST FOR EDUCATIONAL PURPOSE.

HOW TO TRACE IP ADDRESS CLIK HERE AND LEARN

LEARN HOW TO TRACE IP ADDRESS BY IP YOU CAN ACCESS AND HACK ANY COMPUTER.

My Blog List

Showing posts with label computer hacking. Show all posts

Sunday, February 19, 2012

Metasploit Tutorial for Beginners (Part 1)


The Metasploit Project is an open-source, computer security project which provides information about security vulnerabilities and aids in penetration testing and IDS signature development. Its most well-known sub-project is the Metasploit Framework, a tool for developing and executing exploit code against a remote target machine.
Metasploit helps security and IT professionals identify security issues, verify vulnerability mitigations, and manage expert-driven security assessments.

Minimum System Requirements:
  • 2 GHz+ processor
  • 2 GB RAM available (4 GB recommended, increase accordingly with VM targets on the same device)
  • 500MB+ available disk space
  • 10/100 Mbps network interface card
Supported Operating Systems:
  • Windows XP, 2003, Vista, 2008 Server, and Windows 7
  • Red Hat Enterprise Linux 5.x, 6.x – x86 and x86_64
  • Ubuntu Linux 8.04, 10.04 – x86 and x86_64
Required Browser Versions
  • Mozilla Firefox 4.0+
  • Microsoft Internet Explorer 9
  • Google Chrome 10+

Basics Terms of Metasploit

Vulnerability: Vulnerability is a security hole in a piece of software, hardware or operating system that provides a potential angle to attack the system. Vulnerability can be as simple as weak passwords or as complex as buffer overflows or SQL injection vulnerabilities.
Exploit“Exploit” refers to a well-known bug/hole that hackers can use to gain entry into the system.To take advantage of vulnerability, you often need an exploit, a small and highly specialized computer program whose only reason of being is to take advantage of a specific vulnerability and to provide access to a computer system. 
Payload: A payload is the piece of software that lets you control a computer system after it’s been exploited. The payload is typically attached to and delivered by the exploit.

Metasploit Basic Command Tutorial

Msfconsole
Metasploit Tutorial for Beginners (Part 1)

Help
Help:  it will show you the basic commands of Metasploit.
Metasploit Tutorial for Beginners (Part 1)

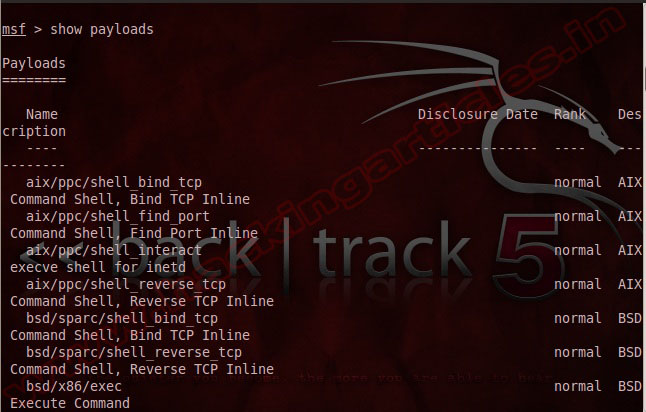
Show payloads
Show payloads:  it will show you all the available payloads on Metasploit.
Metasploit Tutorial for Beginners (Part 1)

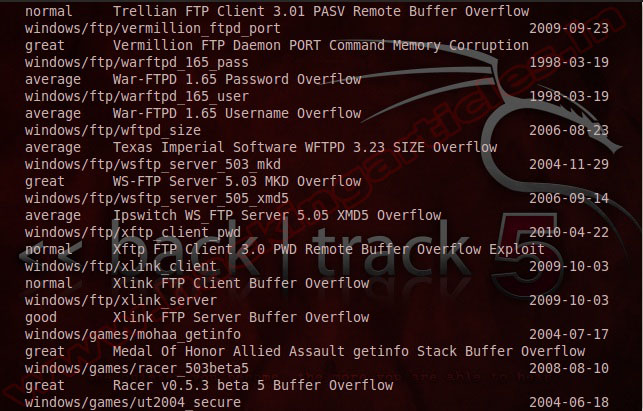
Show exploits
Show exploits: it will show you all exploits in Metasploit.
Metasploit Tutorial for Beginners (Part 1)

msf> use <exploit> to use a exploit or payload
msf exploit (name)> set payload <paload name>To add specified payload
msf exploit (name)> set rhost <victim ip>To add victim ip address to specified exploit#
msf exploit (name)> set lhost <localhost ip>To add attacker ip address to specified exploit#
msf exploit (name)> unset rhostTo remove rhost value
msf exploit (name)> unset lhostTo remove lhost value
msf exploit (name)> setg rhost <victim ip>To add victim ip address globally
msf exploit (name)> setg lhost <localhost>To add localhost(attacker) ip address globally
msf exploit (name)> sessions -l -vTo see list of sessions

Wednesday, January 25, 2012

Theef-Backdoor Trojan


BackDoor Trojan : Theef The Best Hacking Tools | Ethical Hacking


Theef is a Windows based application for both the client and server end. The Theef server is a virus that you install on your victims computer, and the Theef client in what you then use to control the virus. The biggest problem with using Theef is that most Anti-Virus programs will pick it up. But with a little bit of social engineering you can generally get people to turn off their AV for you.


Theef is definitely among the best hacking tools I have ever used. It is easy to use and intuitive, but best of all it gives you a great deal of options. This is why you will be learning to use it today.


 So lets begin. First of all you need a target. This should be relatively easy to find, as I would imagine that the large portion of you reading this article already have someone in mind that you want to hack. If not, feel free to grab a second computer just so you can try this stuff out. For the purpose of this tutorial our victim is named Bob. And we are going to pretend that we are giving him an installer for a game called Awesome Game.


Now you need to convince your victim to turn off their Anti-Virus if they have any. This is because Anti-Virus programs will generally pick up Theef as a virus and delete it. Convincing someone to turn off their Anti-Virus is not often a difficult task, most of the time you can just tell them something along the lines of, &quote;Your Anti-Virus says Awesome Game is a virus, but it isn’t so don’t worry about it.&quote; People are gullible, they want to believe you will cause them no harm, they want to trust you. Use this to your advantage.
The next thing we have to do is configure the program. This is an easy task to do. And to make it easier I will walk you through it using screen shots to help showcase the items you might want to change.


First make a copy of the Theef server. The Theef server is named Server210.exe. Name your copy of the server awesomegame.exe.


Screenshot showing awesomegame.exe is a copy of Server210.exe

Screenshot showing awesomegame.exe is a copy of Server210.exe


Now that we have a copy to work on we need to open up the editor. The server editor is named Editserver210.exe. Once it is opened you should be presented with a window that looks like this:

Screenshot of Theef Server Editor without a server loaded.

Screenshot of Thief Server Editor without a server loaded.


From here we need to open up our server for editing using the Load button. Once the server is loaded some values our to be filled into the boxes. The values on the first page can be left alone. In the forums I will be putting up a detailed list of what every option does, but for this tutorial we will only focus on what is needed to give Bob a virus.


To make it look plausible that Awesome Game is indeed a game and not a virus we need to setup a false error message. To do this click Setup->False Error. On this screen check the box to enable false errors, then fill in the Input box labeled text with the following “The installer failed to run!” Your screen should look like this.

Screenshot showing the False Error Screen of the Theef Server Editor


Screenshot showing the False Error Screen of the Theef Server Editor


Now the server is ready to be saved and sent. Click the Save button to save the server configuration. The status bar should now say “Finished writing new server settings.” You may now close out of the server editor.
The next step is generally the hardest. You need to send the virus (in our case awesomegame.exe) to your victim and get them to run it. Now for the purposes of our tutorial we have decided to send Bob a “game” by the name of Awesome Game. Little does Bob know that Awesome Game is not a game, but our virus. We have sent Bob Awesome Game using Windows Live Messenger. If your victim is running Vista (like Bob is) then you will need to have them run the virus using Admin privileges.


Now that you have given them the virus the real fun can begin. From here we do everything in the Theef Client. This is the program that you use to control the virus. It is named Client210.exe. You should open it at this point.
Screenshot of Theef Client before connecting to a server.


Screenshot of Theef Client before connecting to a server.
You will need to get your victims IP address at this point so that you can connect to their computer. This is an easy task to do, and there are numerous ways to accomplish it. For our example we have convinced Bob to go to http://privax.us/ip-test/ and read his IP Address off to us from that page. We could also have gotten him to run ip-config or done any number of other things. If you have no idea what an IP Address is, just direct them to Privax’s IP Test and get them to send you their IP address off the page.
Using one of the aforementioned methods I have determined that Bob’s IP Address is 127.0.0.1 (please note your victim’s IP Address will differ from the address I have used in this example).
I now enter that into the IP input box on the Theef client and press Connect. If you have the correct address and they have run the virus you should see something similar to the following show up in the log box:


[15:56:44] Attempting connection with 127.0.0.1


[15:56:44] Connection established with 127.0.0.1
[15:56:44] Connection accepted
[15:56:44] Connected to transfer port


If you don’t have their IP Address correct or they have not run the virus you will see this instead:


[15:57:37] Attempting connection with 127.0.0.1


[15:57:58] Connection failed (Error: 10060)


Now that we are connected we can start to take do stuff. There are numerous features in Theef so I will only cover a small number of them here. I will likely cover more in the forums as time goes on. Also note that not all features of Theef work, and fewer features will work in Vista than in XP.
One of the most useful features of Theef is the key-logger, which is available under the Spy menu. Upon selecting it a key-logger window will open up as shown.


Screenshot of Theef Keylogger before it logs any keys.


Screenshot of Theef Keylogger before it logs any keys.
After you click the Start button on this window you will begin to see everything that they type on their computer. This is very useful as it shows you ever password they enter. It is a one stop shop to getting their passwords to everything and things such as their bank account numbers, etc.
There are other features in Theef that can be used for just screwing with people as well. Underneath of the Control Menu there is a button labeled Power. If you click that you will notice an Open/Close CD-ROM Drive button. Most people freak out if their CD-ROM Drive randomly opens and closes without them doing anything.
So this concludes my brief tutorial on how to use Theef. There is a lot more in this program that I covered here, but this should give you the basics on how to get started. Below I have posted two videos showing many more things that Theef can do. If you play these videos at the same time you can see how the client controls the server.


I would like to say thank you and highly appreciate your support. Please subscribe from the link bottom to appreciate my work and get the daily updates. Thank You.


Its password is tat4cai

Saturday, January 14, 2012

How to use prorat(system Hacking Full Guide)


  • Click on Create  and then Create ProRat Server

  • Enter your host name or IP in the ProRat Notification If you don’t know you IP address click the red arrow and It will fill you IP address automatically.
  • Now open Notifications at the sidebar and select the second option “Mail Notifications” Change this to the your email address where you want to receive notifications when the server is installed into your victims computer.

  • Click on Bind with file on the sidebar. You can bind it with a text document or Image File

  • Now Click on server Icon and choose the desired icon and click on Create server.


The server gets installed silently in the computer background and the hacker will be sent a notification to the email address he described in the notification tab whenever the victim is infected

Wednesday, January 11, 2012

Monitor and control remote computer by Network LookOut Administrator Professional 3.6.1


Network LookOut Administrator Professional 3.6.1 | 5.6 MB
The Network LookOut Administrator allows you to see live screens of remote computers. This way, you can always watch what users are doing on the remote computer. Additionally, you have the ability to take control of a remote computer by controlling the mouse and keyboard; this is especially useful when you need to assist the person who uses the remote computer. If you are an administrator, you can easily administer remote computers from your computer.

What does it do?
It allows you to see live screens of remote computers. This way, you can always watch what users are doing on the remote computer. Additionally, you have the ability to take control of a remote computer by controlling the mouse and keyboard; this is especially useful when you need to assist the person who uses the remote computer. If you are an administrator, you can easily administer remote computers from your computer.

What is it useful for?
For monitoring your children s activities on a remote computer.
For monitoring students in the classroom to achieve better discipline or, just to assist them (by using the remote control feature) when they are in trouble.
For lowering your business costs by monitoring what your employees are doing on their computers and helping them when they call you. Using the remote control feature enables you to fix problems remotely without visiting them; this saves you precious time.
For administrating all computers just from one location your computer.
Turning off, restarting, hibernating …. remote computers with one click.